Create Auto Scaling Group
Problem in the previous section
As we tested in the previous section, our website was operating normally with a number of incoming requests. What if we send a lot of requests at the same time? Our website will no longer operate stably and the solution is that we will have to increase more EC2 Instances in the system and rely on Load Balancer to share requests from users.
However, it is not reasonable for us to just sit and wait and add EC2 servers because to initialize an EC2 Instance, we need to have the “core” inside, which is the application that is in charge of processing those requests and along with other libraries.
Set up Auto Scaling Group
Set up Launch template
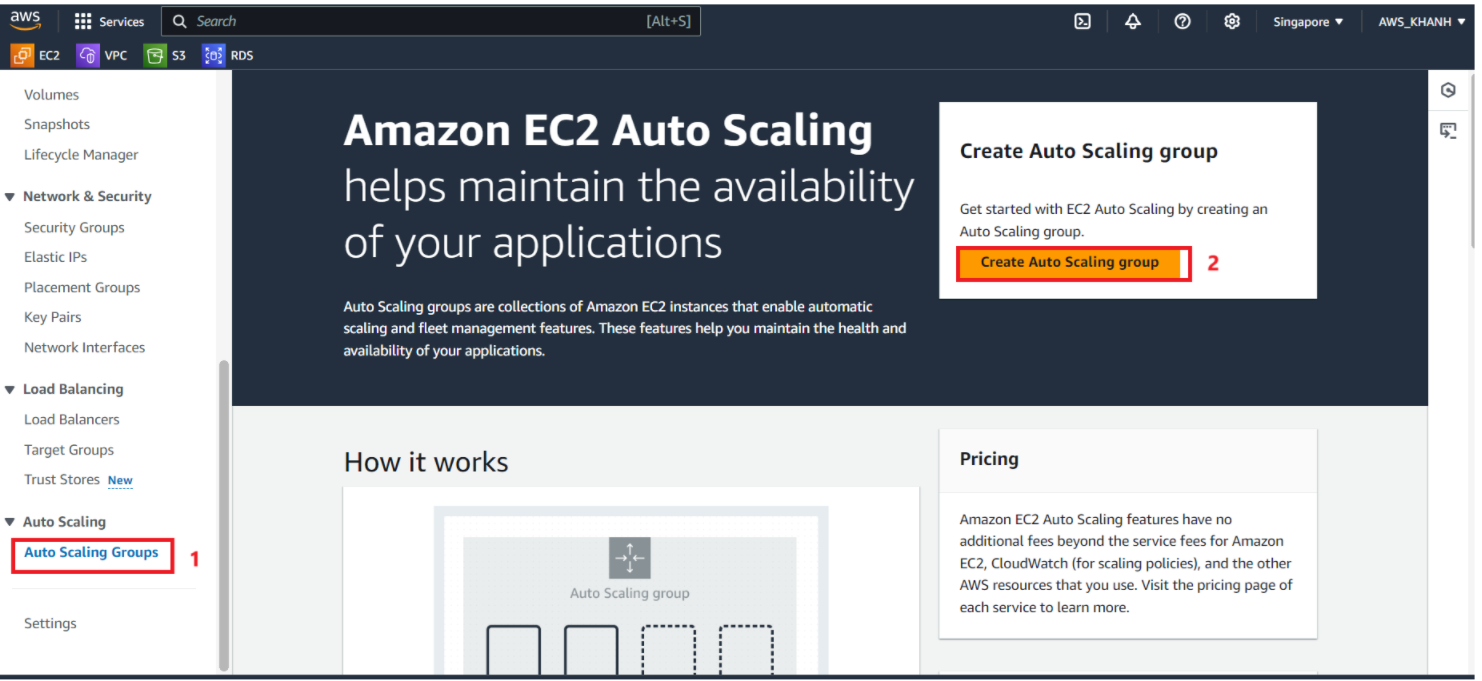
In the EC2 management interface, drag the left menu down to the bottom.
Select Auto Scaling Groups.
Click Create Auto Scaling group.
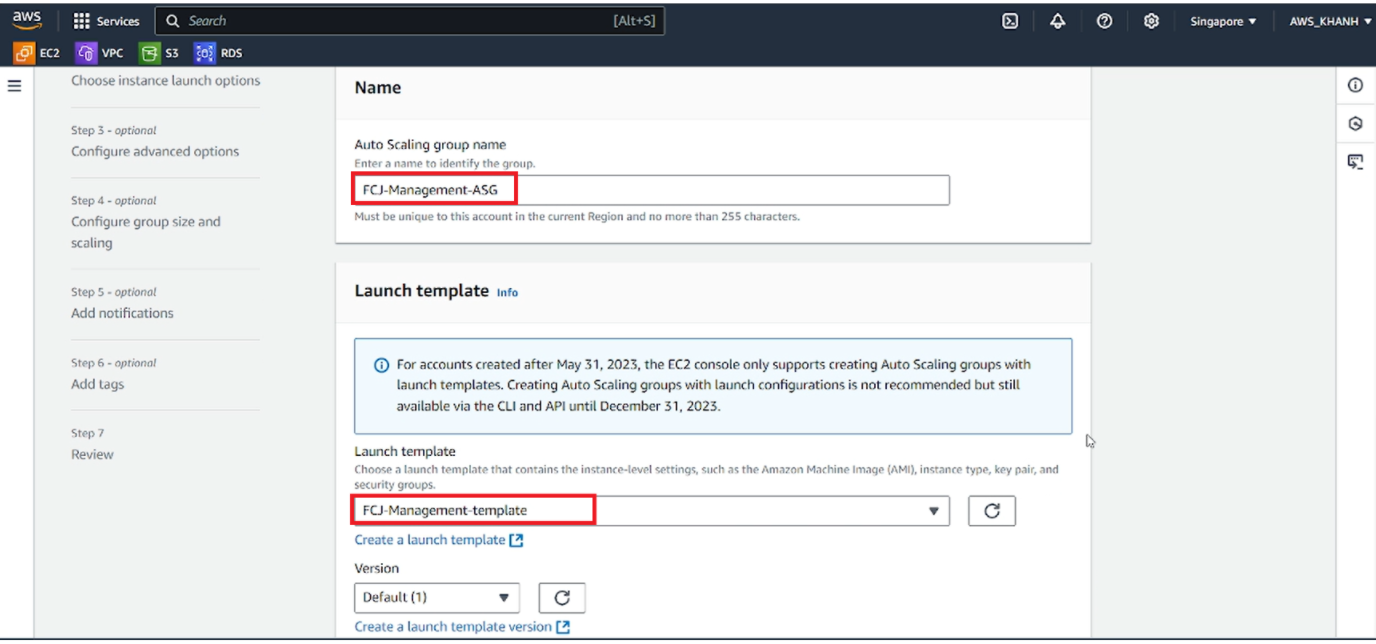
In the interface to create Auto Scaling group, we will fill in the following information
Name:
FCJ-Management-ASGIn Launch template:
Launch template: select
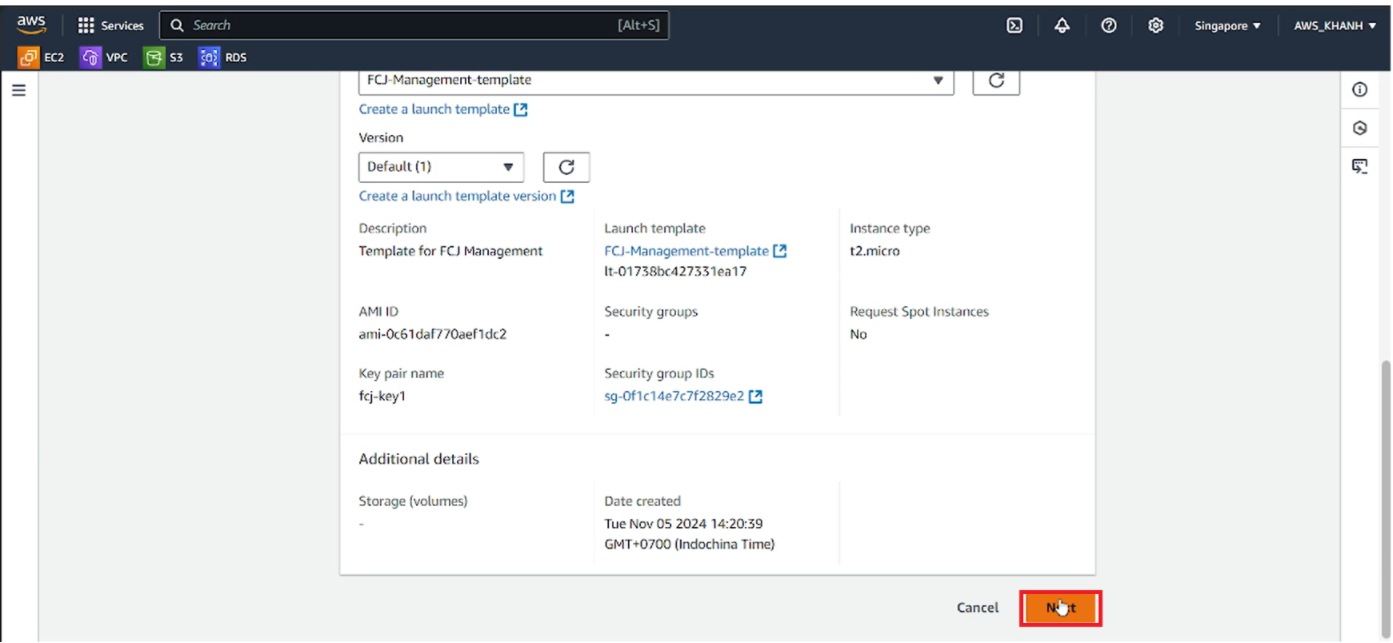
FCJ-Management-template(can be any name).Version: Default (1) according to the default selection.
Note that the name of the ASG you should set is the same as the name of the ASG that was set in the previous section 2.6, the step of preparing data for Predictive Scaling.
The launch template selected for the ASG must be a template that has fully installed MySQL Client, Node, Source Code and PM2 to ensure that the Targets work properly. If you follow the steps in section 2 and section 3, you have done it correctly.
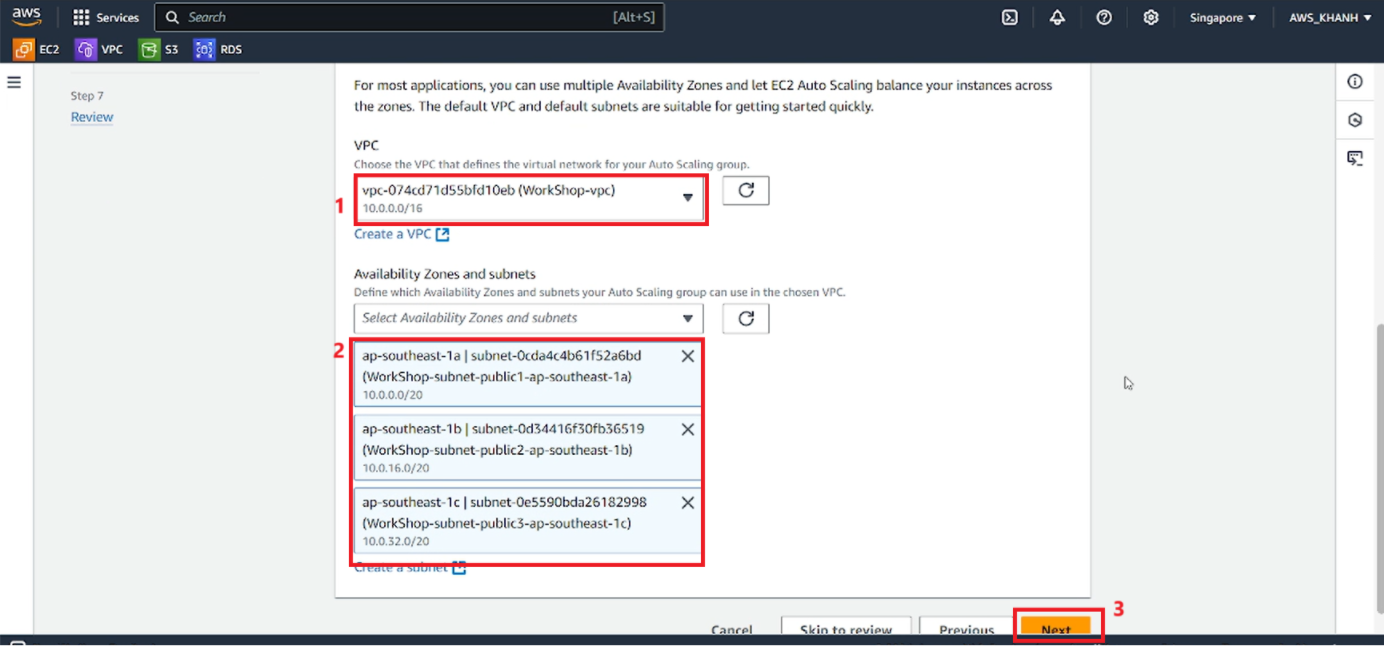
Network settings
In the Network section, select the following information:
VPC: select VPC WorkShop, the VPC we created at the beginning of the article.
Availability Zones and subnets: select the 3 public subnets that we created.
Click Next.
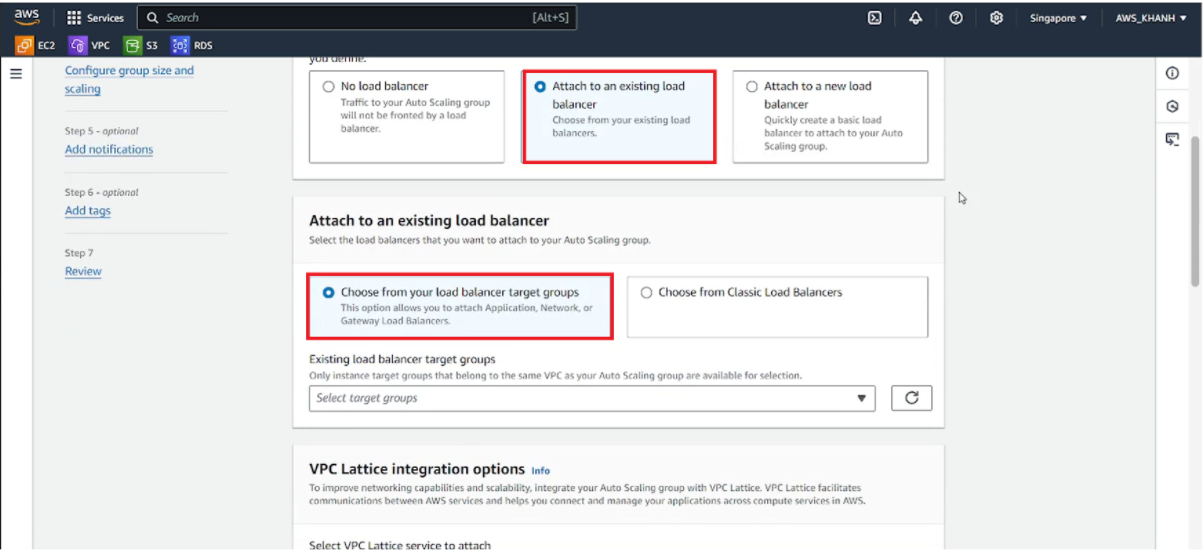
Load Balancer settings and some other things
In step 4, we have created Application Load Balancer and created a Target Group and attached it to that load balancer. So now we will select some options as follows:
Load balancing: select Attach to an existing load balancer.
Attach to an existing load balancer: select Choose from your load balancer target group
Existing load balancer target group: select FCJ-Management-TG | HTTP.
In the VPC Lattice integration options section: select No VPC Lattice service, in this article we do not configure this section.
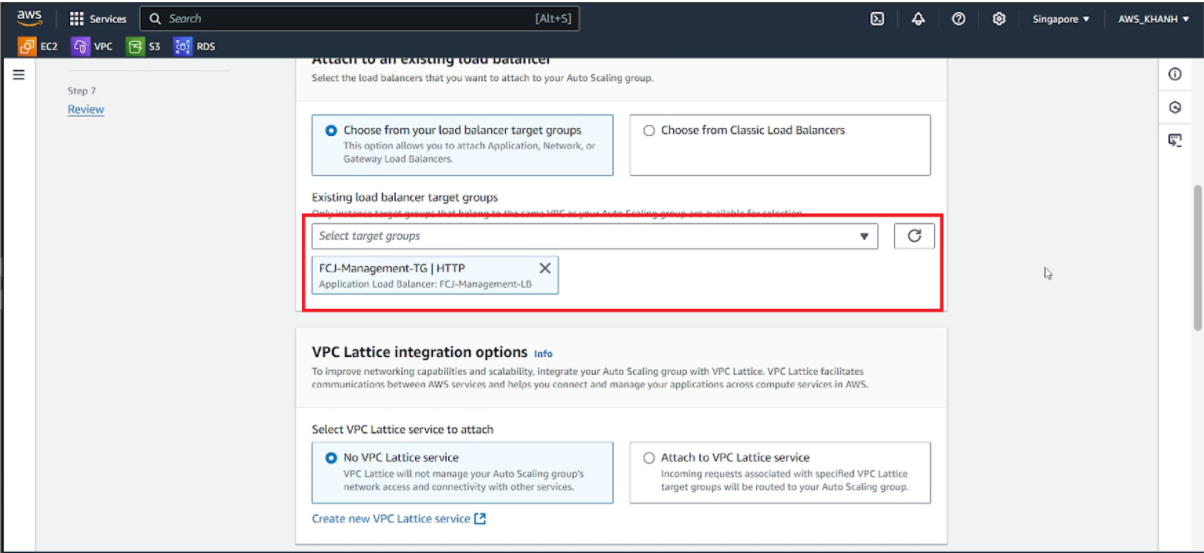
When the Target Group and Application Load Balancer are configured correctly, in the Existing load balancer target group option we can see that Target Group is listed, meaning that both ALB and TG exist.
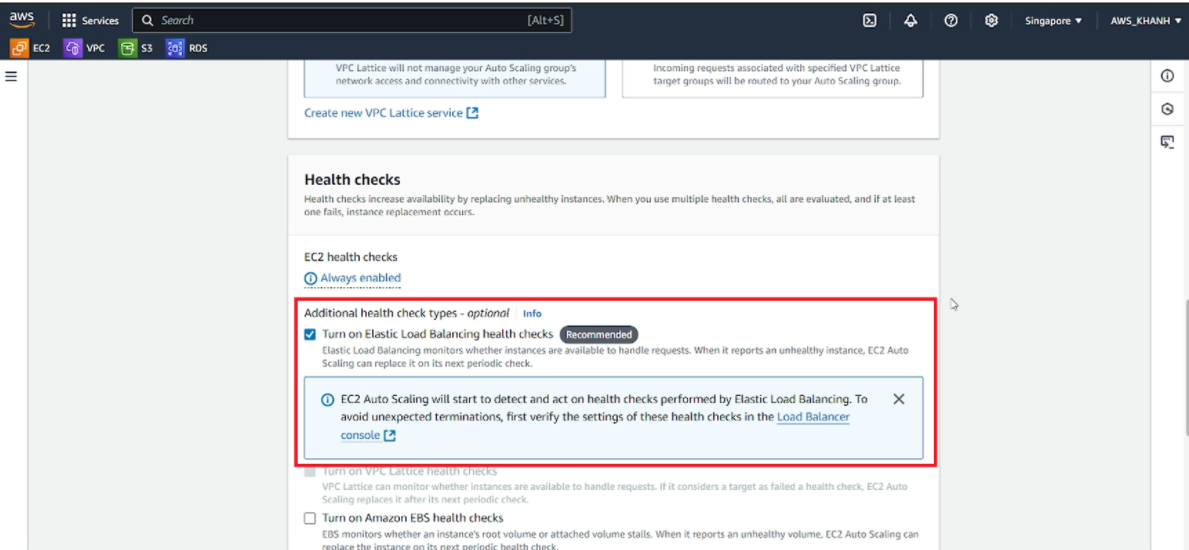
Next is Health checks, we will select (check) Turn on Elastic Load Balancing health checks. Leave the remaining settings as default.
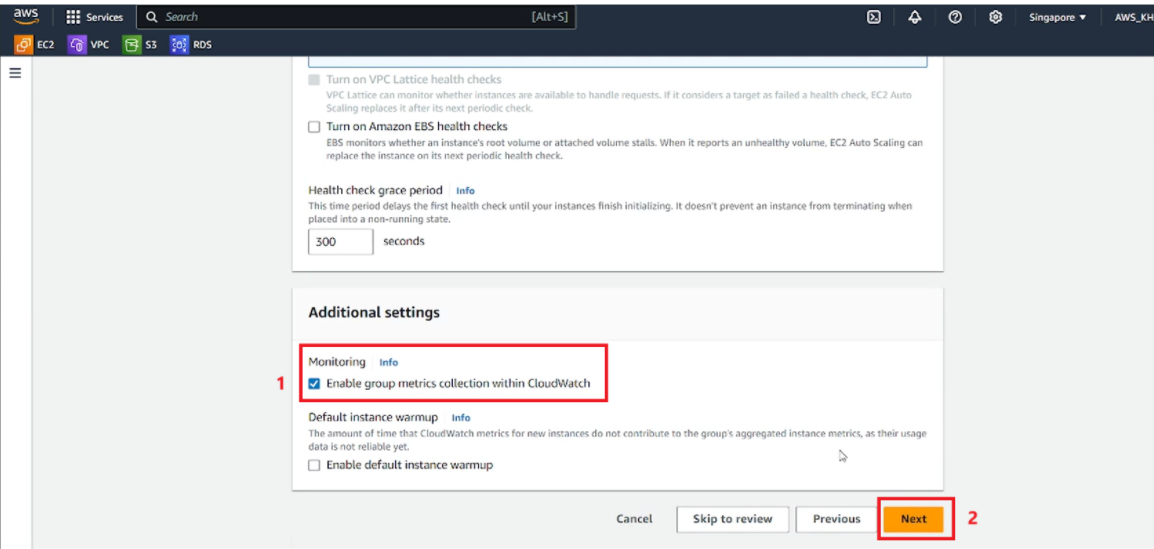
Additional settings, in the Monitoring section:
Select (check) Enable group metrics collection within CloudWatch.
Click Next.
Set Size and Scaling for Group
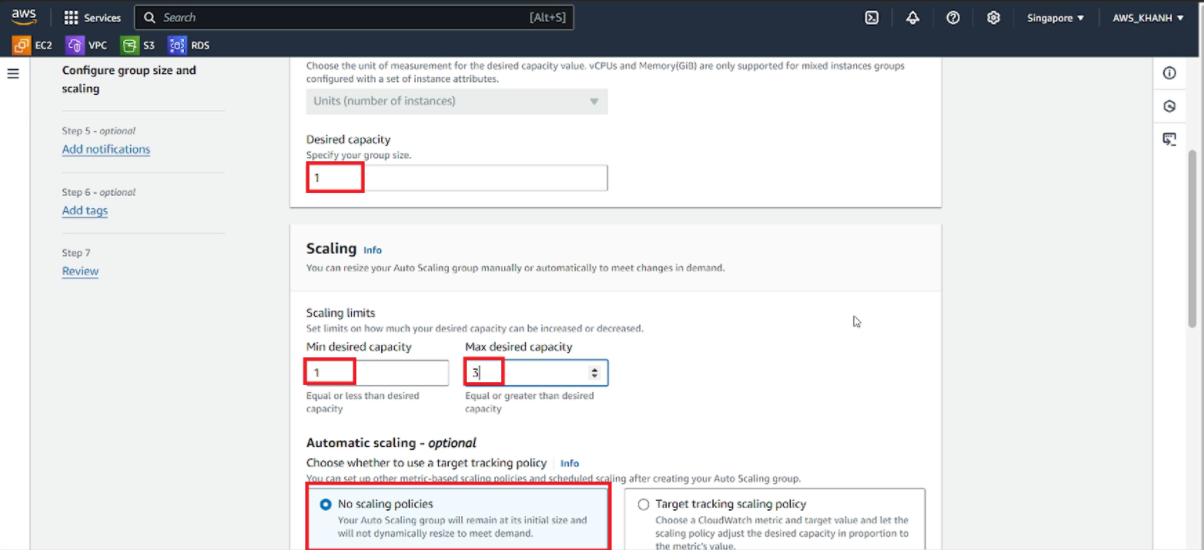
In this section, I will determine the scaling behavior of the Group and the number of Instances that will be initialized during the Scaling process, including Scale out (expand) and Scale in (shrink).
- In the Group size section:
- Desired capacity: 1
- In the Scaling section:
- Scaling limits:
- Min desired capacity: 1
- Max desired capacity: 3 (depending on the number of servers you want)
In Automatic scaling - optional: select No scaling policies, temporarily I will not set a scaling policy for ASG.
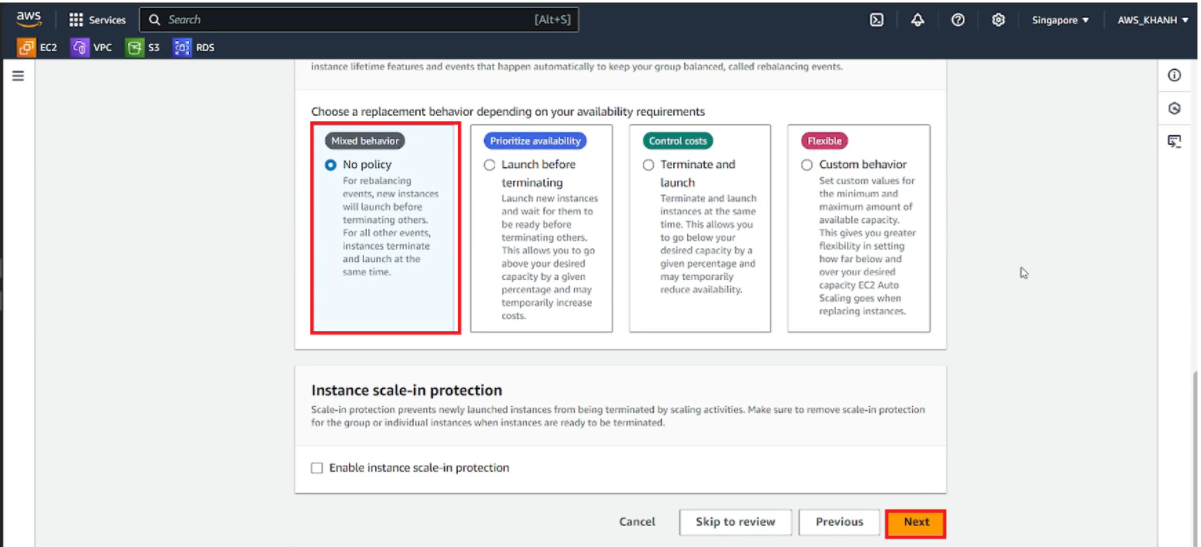
In Instance maintenace policy: select No policy, then click next.
Set up notifications
We will set up notifications to email (using Amazon SNS) when ASG:
Initialize a new Instance.
Destroy an Instance.
Fail to initialize an Instance.
Fail to destroy an instance.
We will only create notifications to a single email, including the following information:
Send a notification to:
asg-topic. I will choose a topic to send.With these recipients: enter the email you want SNS to send to.
Event types: select all.
Click Next.

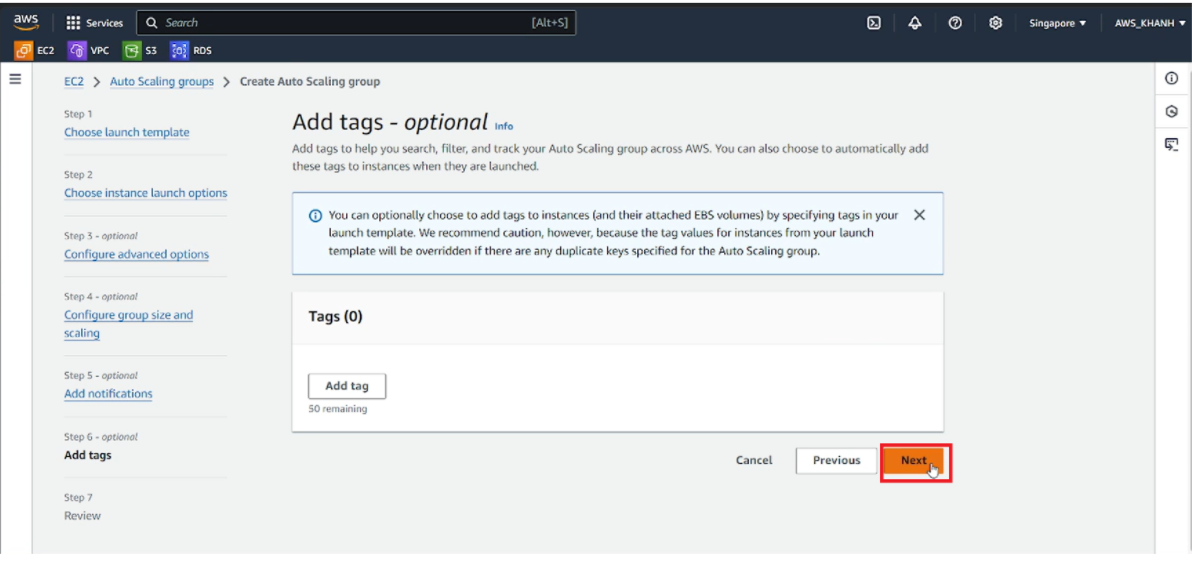
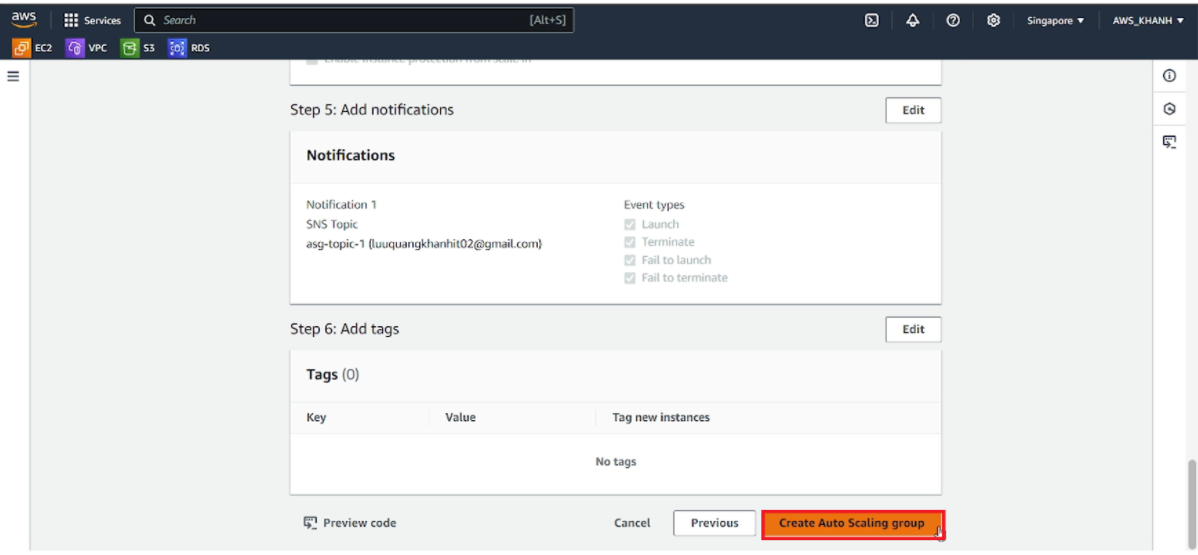
Confirm the information and Create Auto Scaling group.
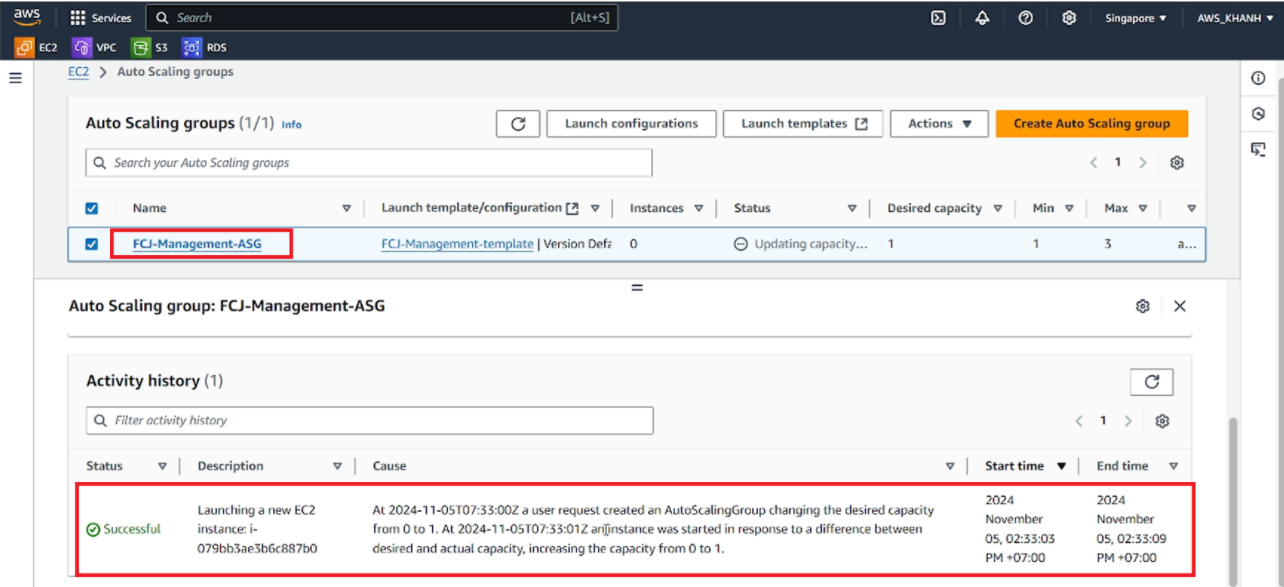
Result
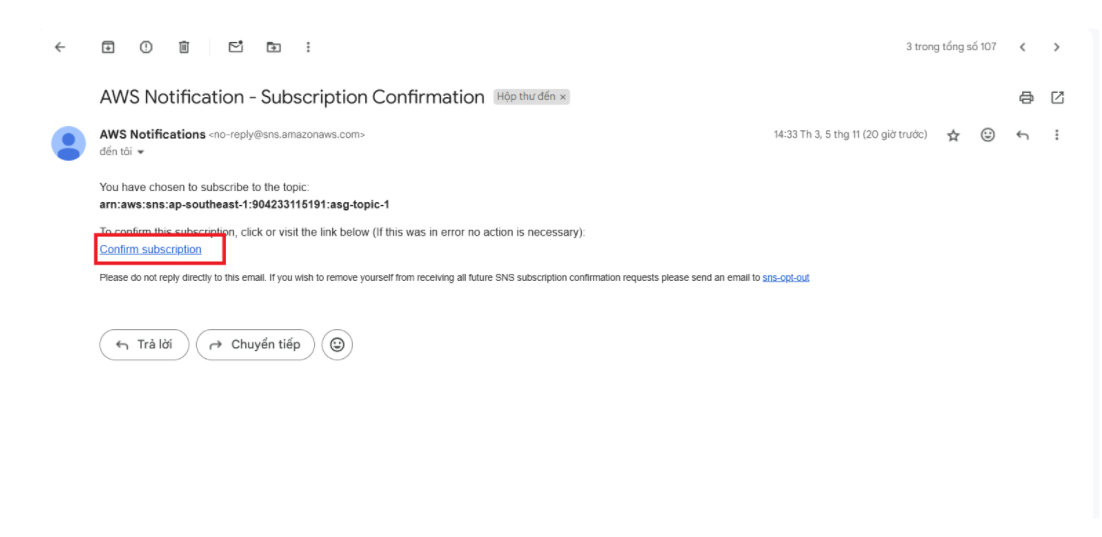
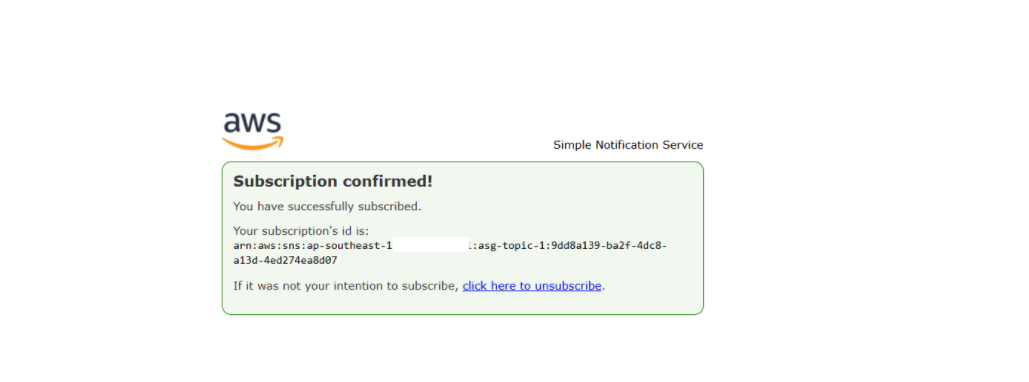
Check and register to receive emails from the topic.
Go to the Activity tab of ASG FCJ-Management-ASG to check