Network Infrastructure Setup
Create VPC
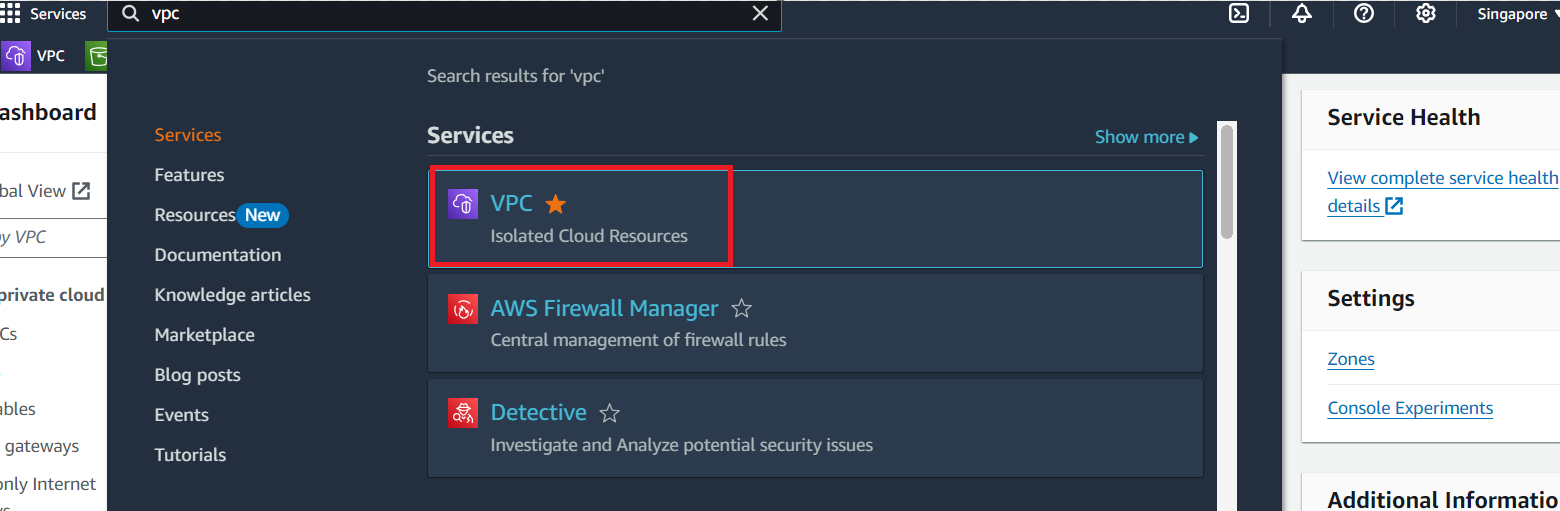
Go to AWS Management Console
- Find VPC
- Select VPC
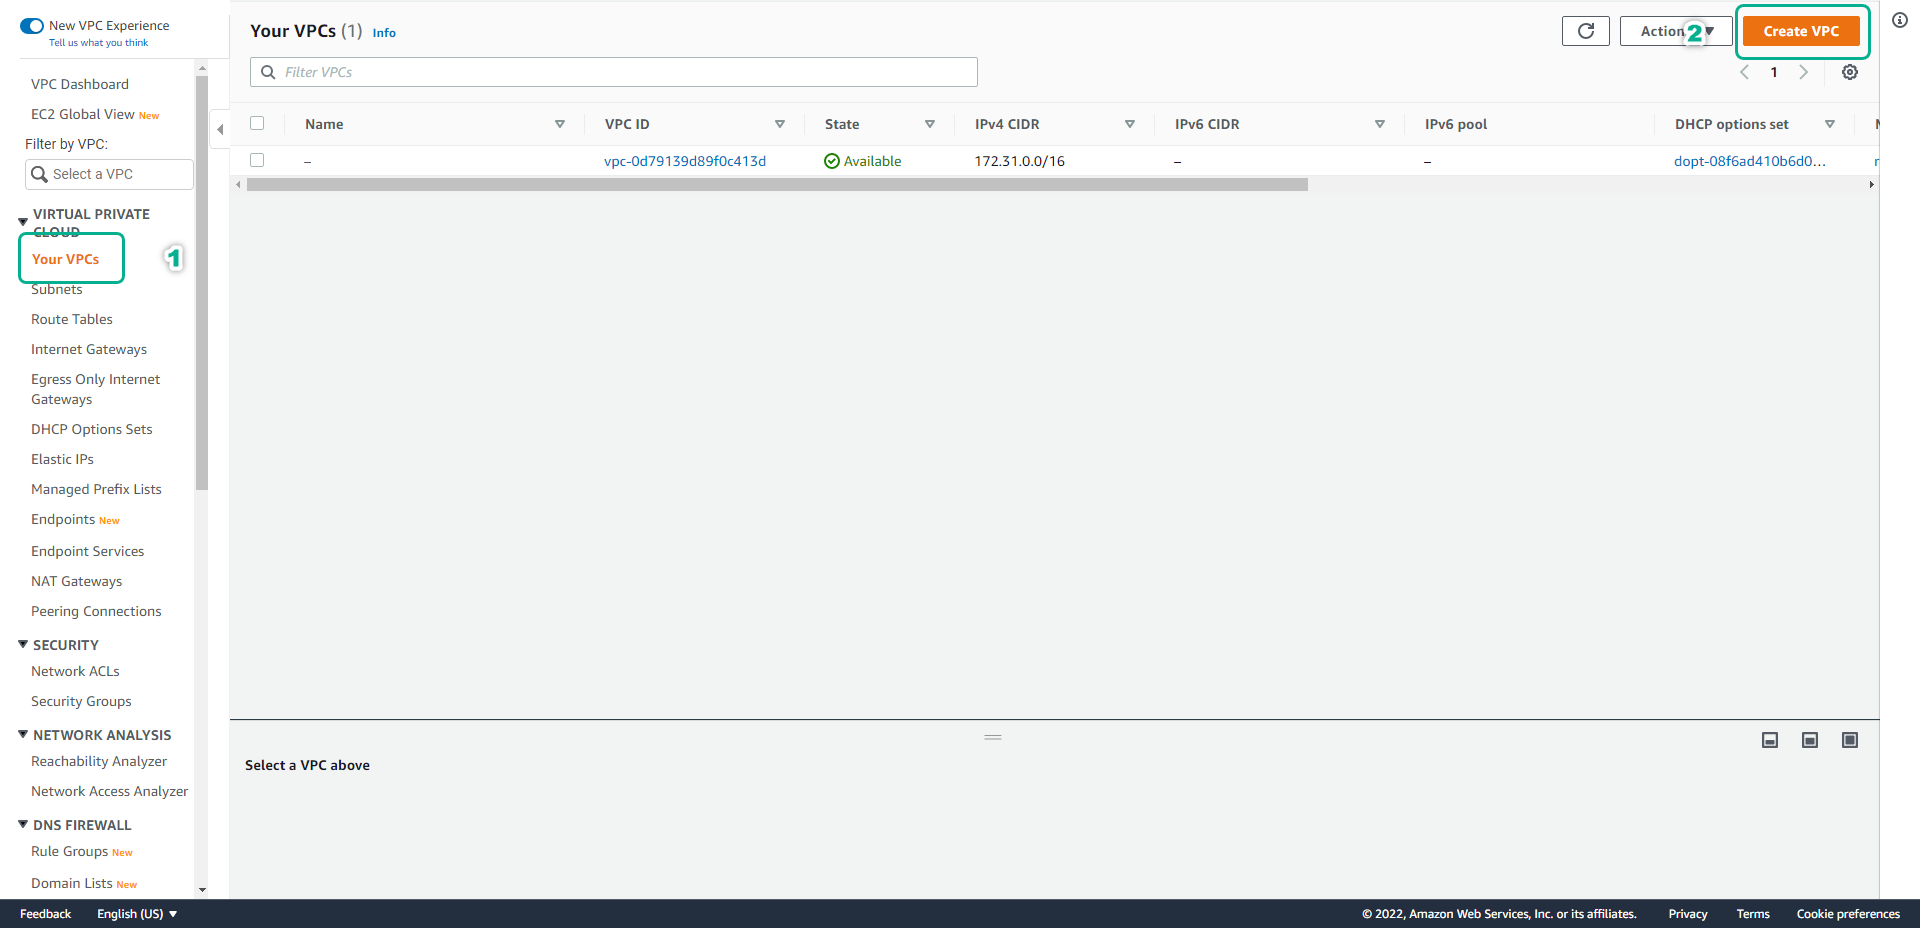
In the VPC interface
- select Create VPC
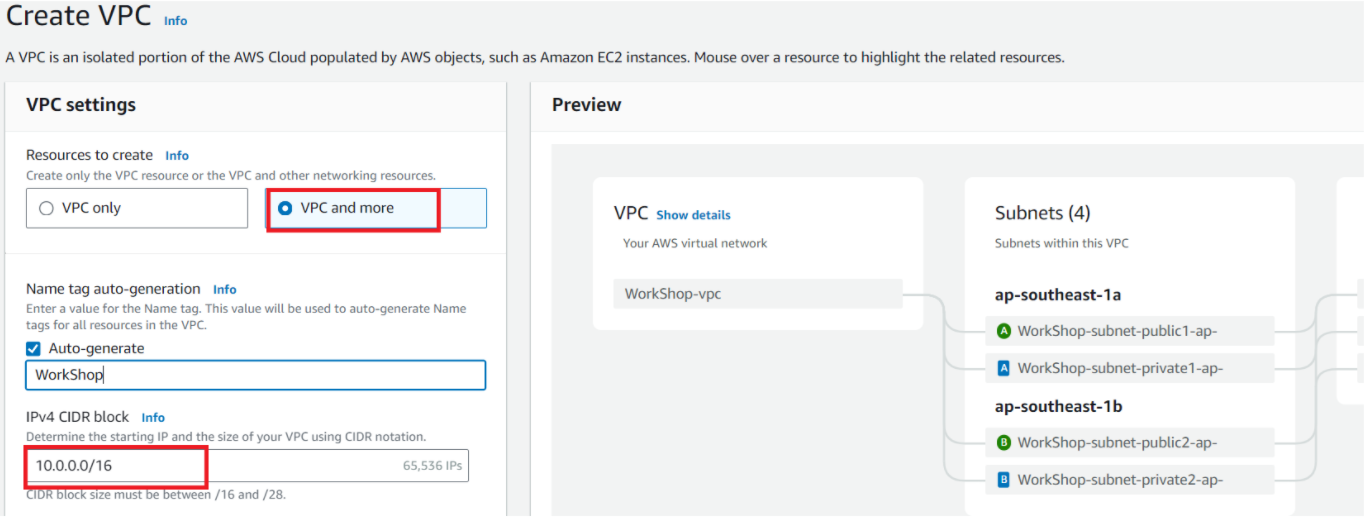
In the Create VPC interface
- Select VPC and more
- Name, enter your VPC name. In this lab, we name it
WorkShop - IPv4 CIDR block, enter
10.0.0.0/16
Select as follows:
- Number of AZs is 3
- Number of public subnets is 3
- Number of private subnets is 3
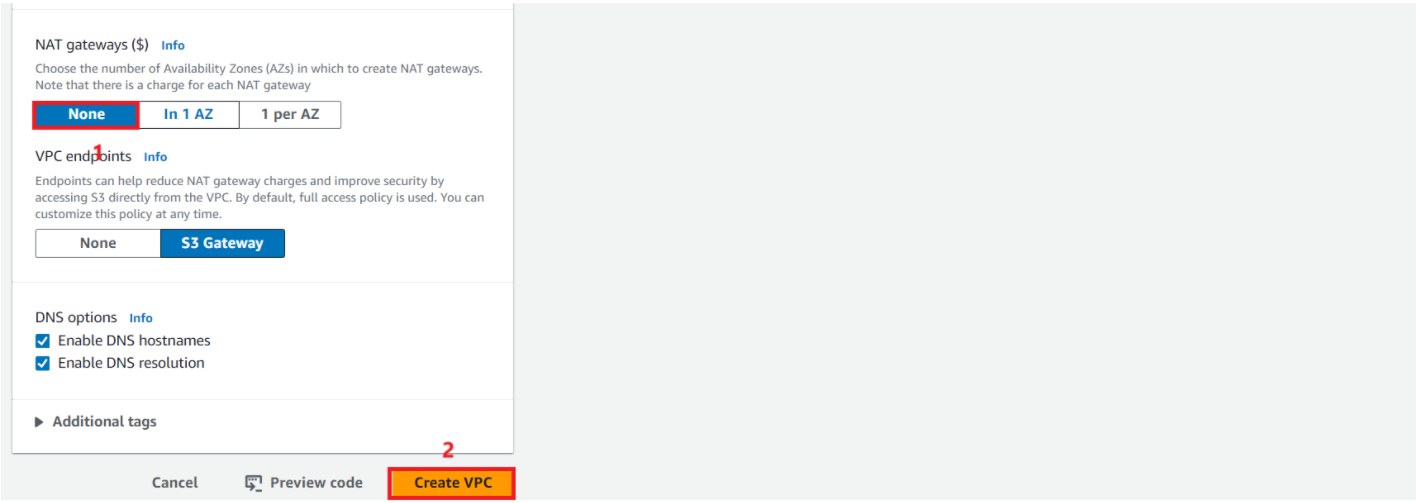
- Nat gateways select None
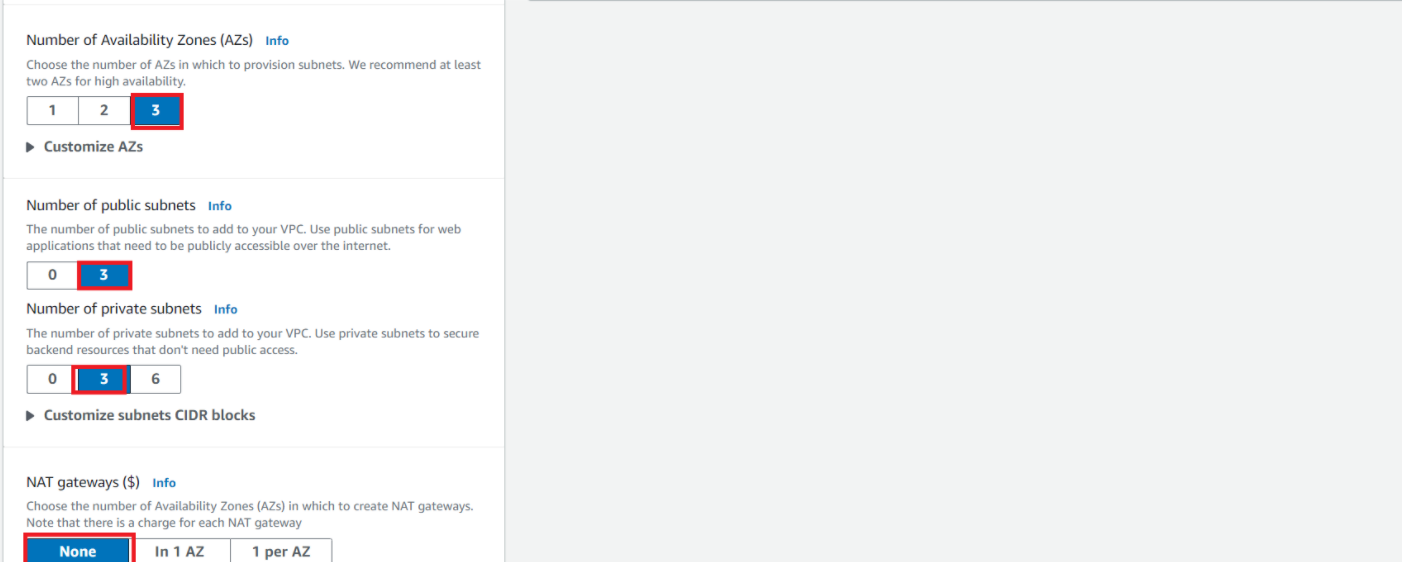
- VPC endpoints select None
- Select Create VPC
Perform public IP allocation.
Perform public IP allocation.
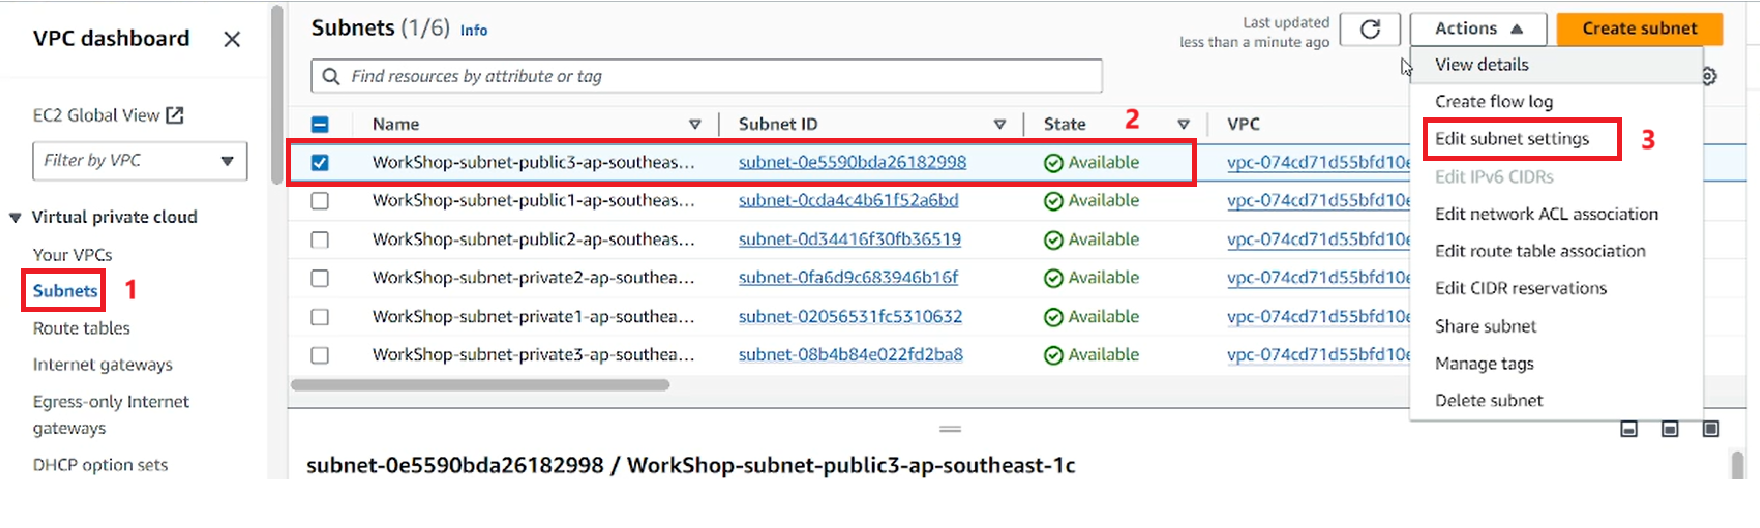
- Select Subnets
- Select public subnet
- Select Edit subnet settings
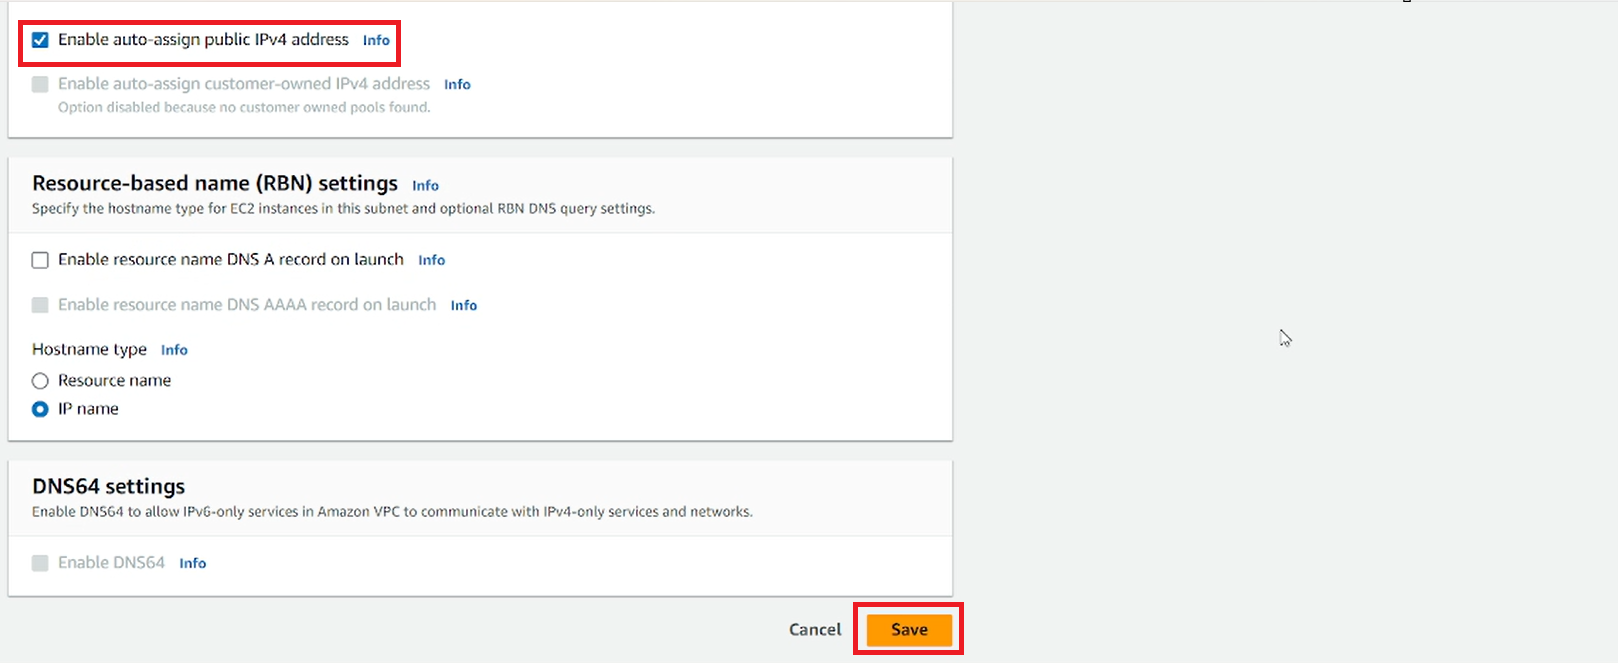
Select Enable auto-assign public IPv4 address. Then Select Save
Check that the assignment was successful.
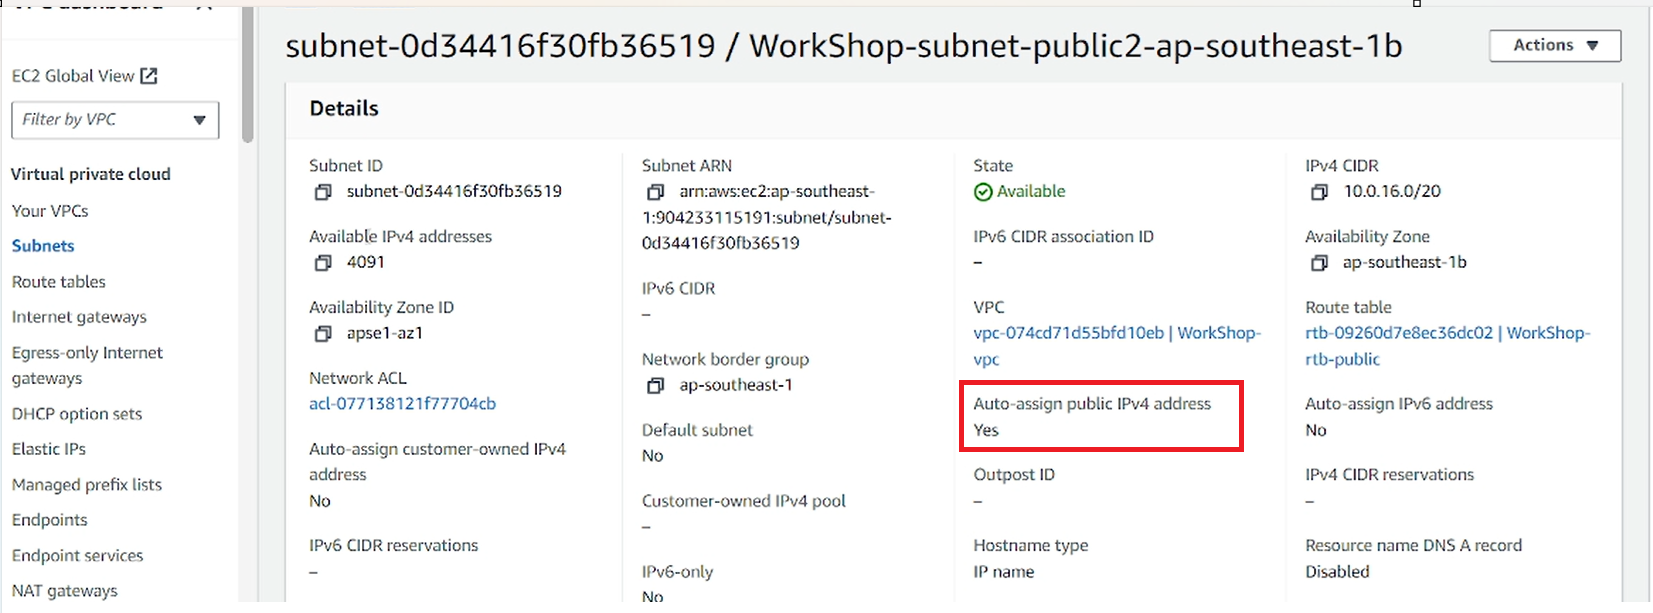
Perform the assignment for the remaining Public subnet (do the same). Next, we will create a Security group for the application.
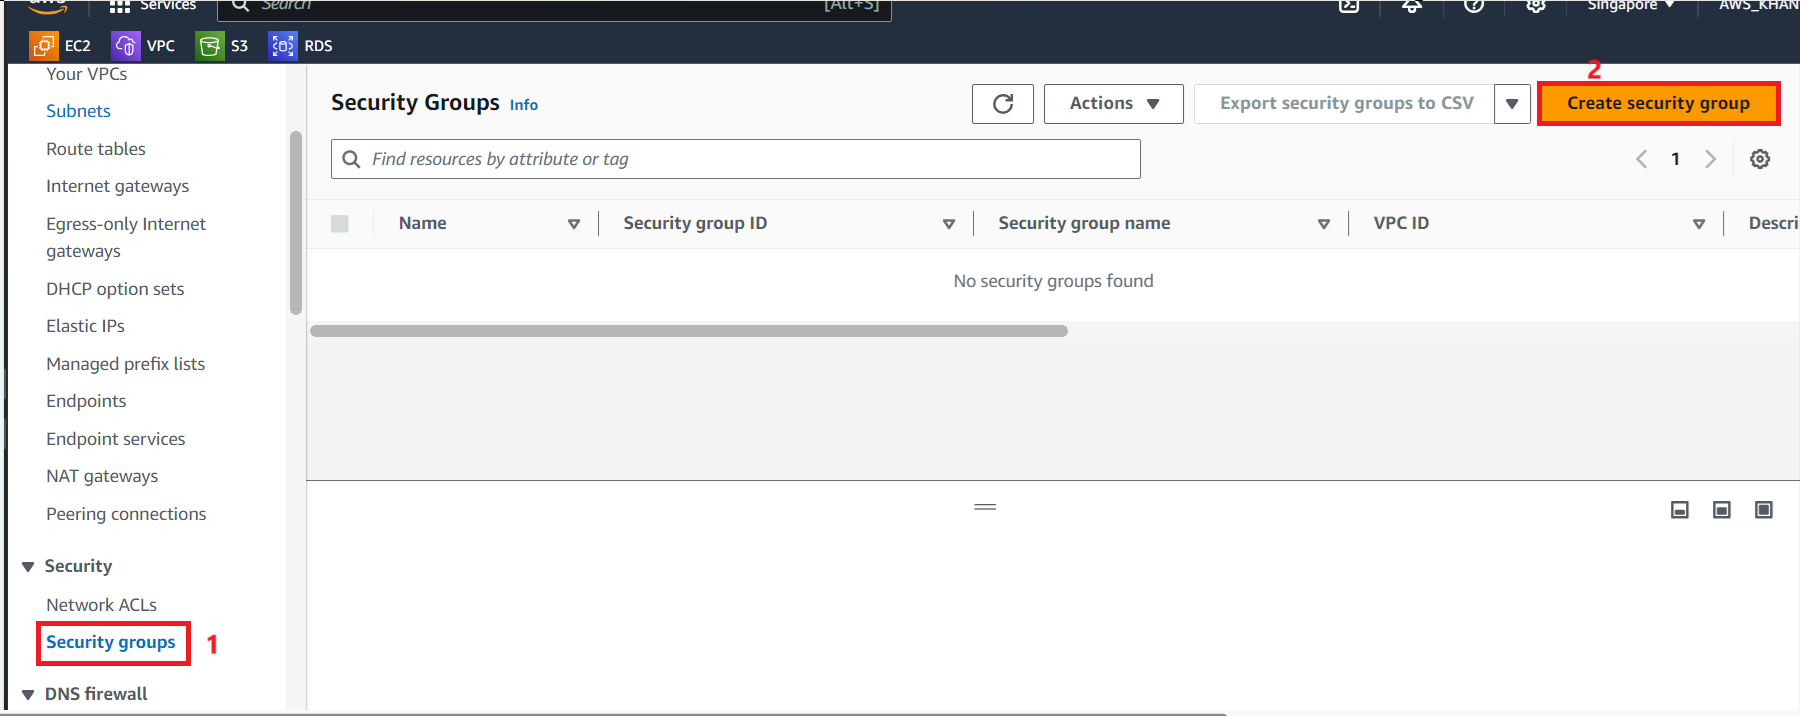
In the VPC interface, select Security groups
Select Create security group
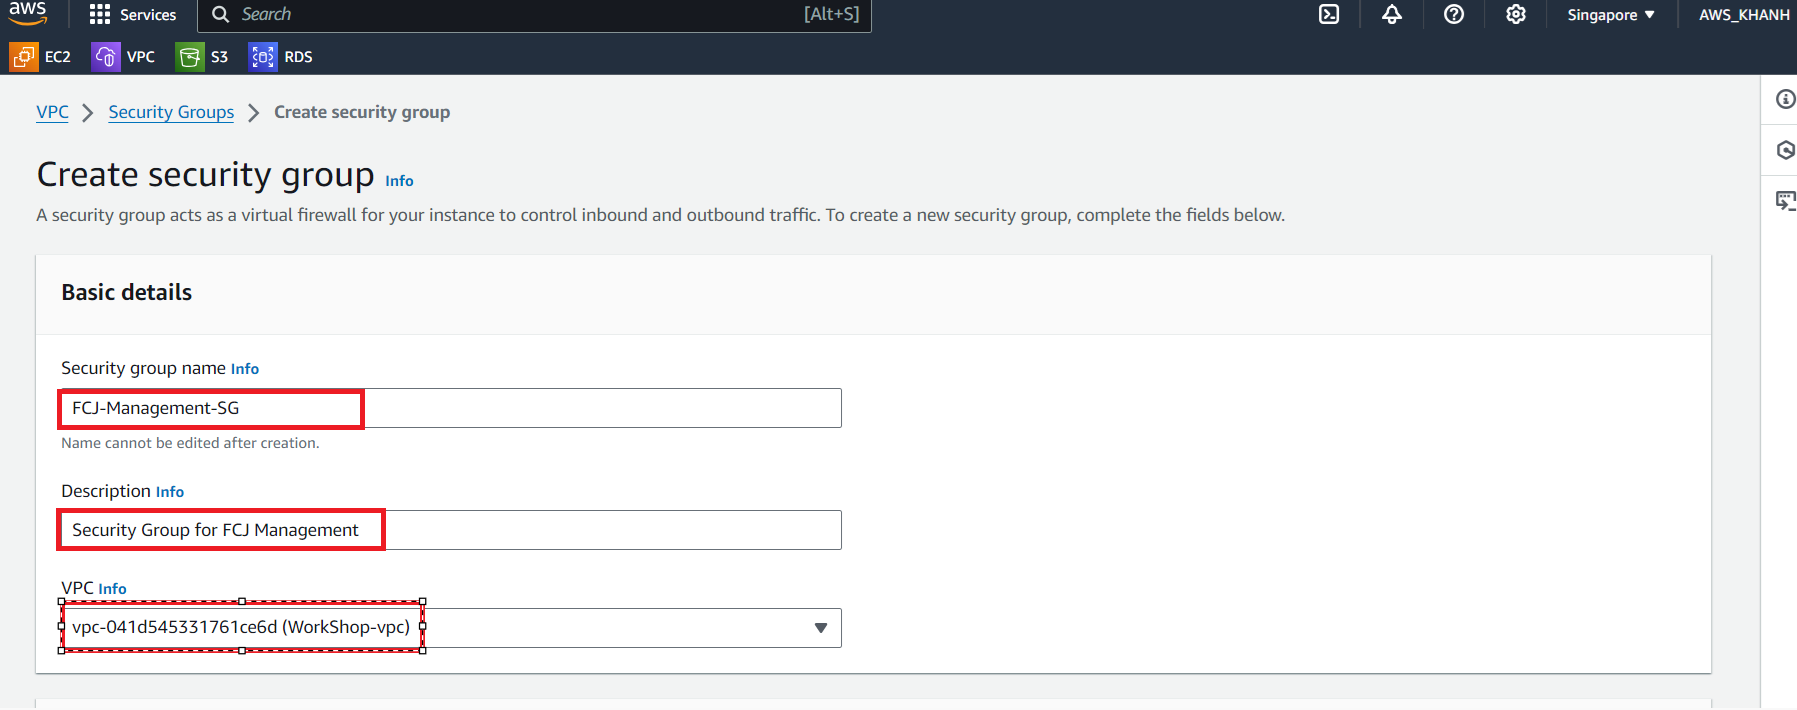
Configure Security Group
- Security group name, enter
FCJ-Management-SG - Description, enter
Security Group for FCJ Management - VPC, then select the newly created VPC:
WorkShop
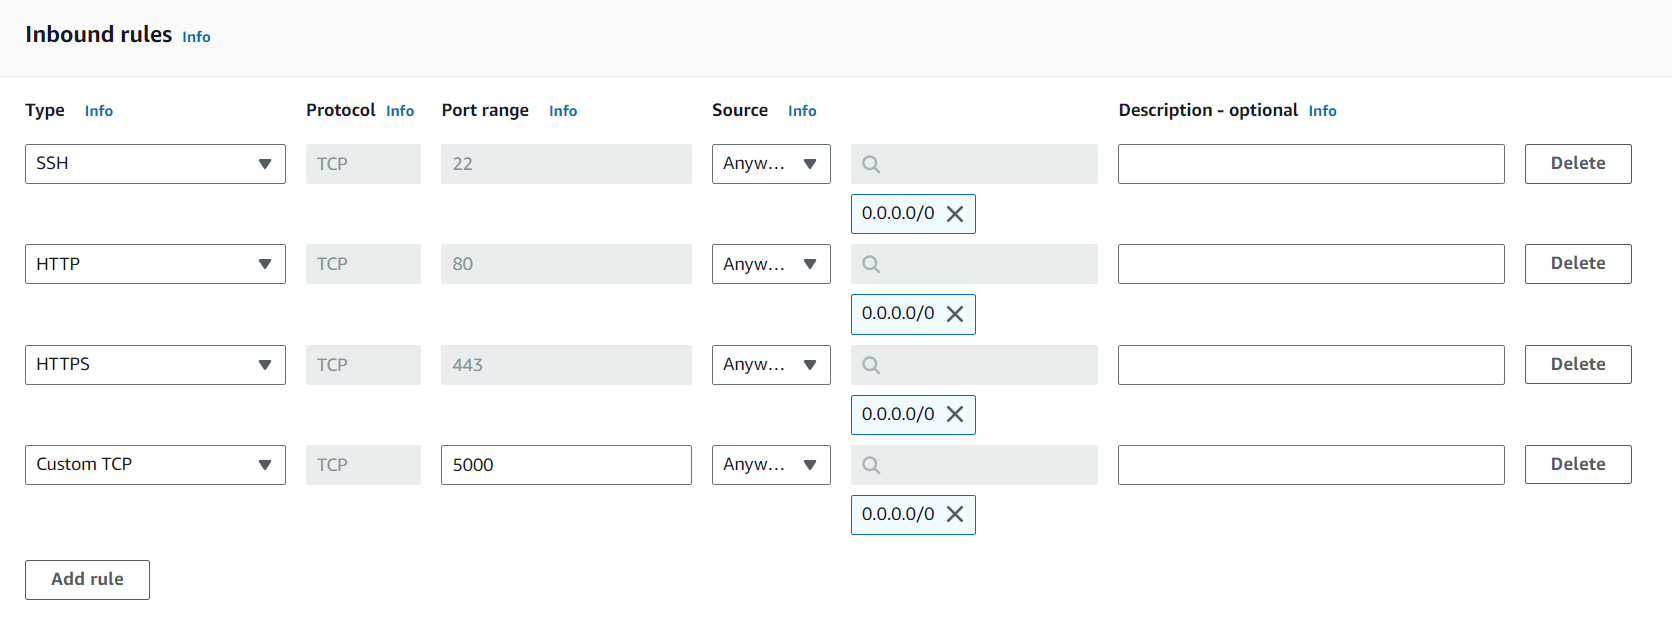
Configure Inbound rules
- First, configure SSH port 22 and Source: MyIP to be able to access the instance.
- Next is HTTP port 80.
- Custom TCP port
5000for FCJ Management - HTTPS port 443.
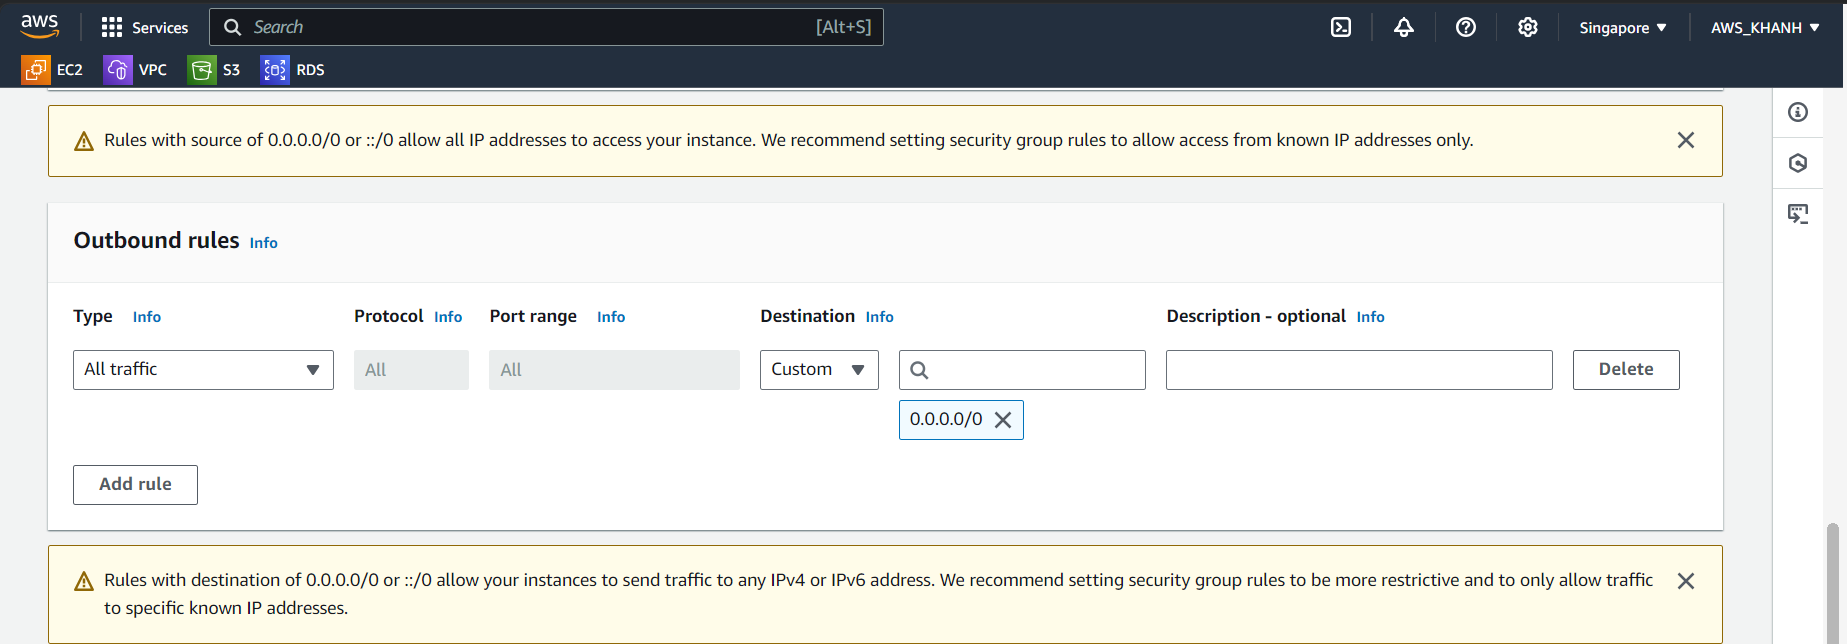
Check Outbound rules and select Create security group
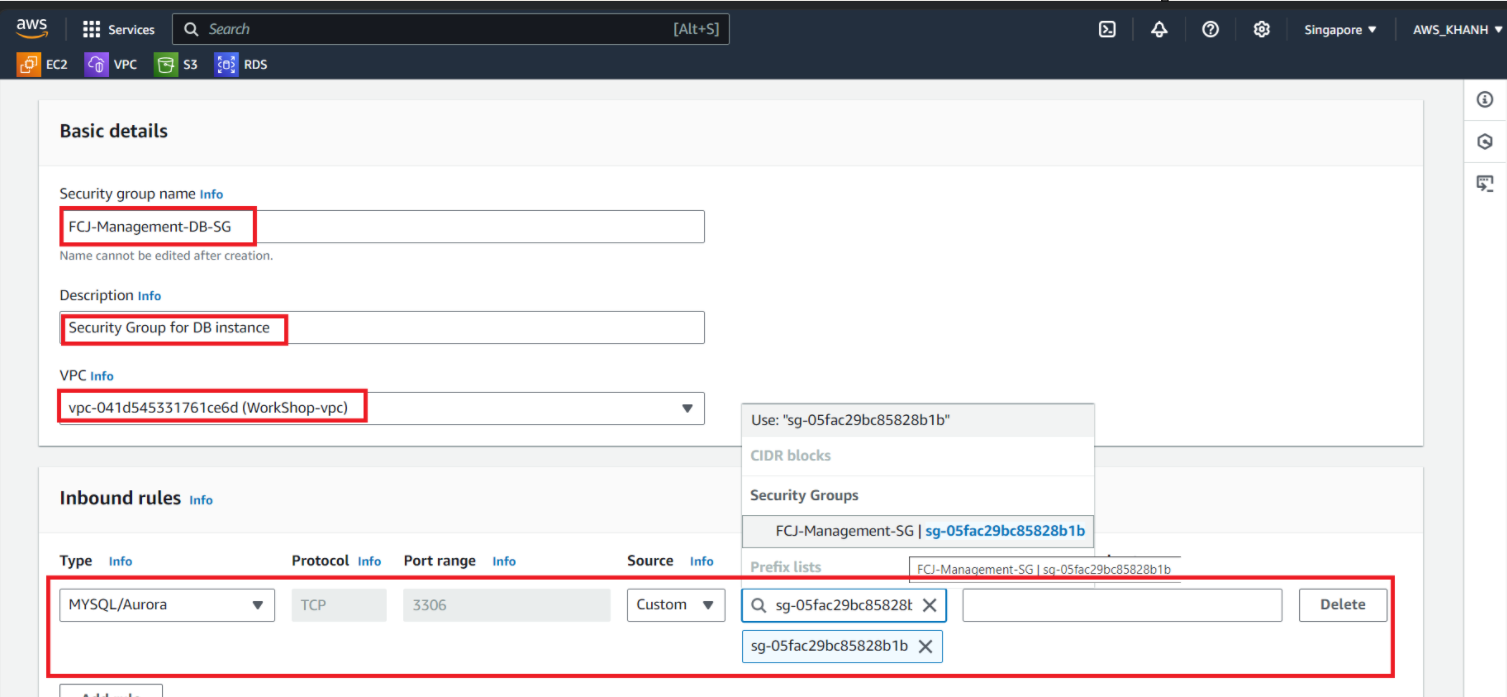
Create Security group for Database instance
We create Security group for Database instance. To ensure security, do not configure the general Security group of the application. Configure security group
- Security Group name, enter
FCJ-Management-DB-SG - Description, enter
Security Group for DB instance - Select the newly created vpc
Configure Inbound rules
- Select Add rule
- Select MYSQL/Aurora port 3306
- Then select Source as FCJ-Management-SG
Check the Outbound rules again and finally click Create security group